Grocery shopping: a simultaneously annoying and necessary process for those of us who wish to eat food. If you’re anything like me, you’ll do anything to cut down on the amount of time you spend pacing product-overloaded aisles trying to find that elusive Reduced Fat Organic Coconut Milk (yes, this was an actual ingredient for one of our selected recipes last week). Fortunately, there are only two major components to master to significantly reduce your shopping time.
I’m talking about learning your store’s organizational scheme and refining your grocery list-making process. The former may require a little time investment up front, but it will save you far more time down the line.
Learning Your Store’s Organizational Scheme
This might be the more esoteric of the two factors. If you’re shopping at a chain grocery store (Safeway, Lucky, or for the East Coasters, Kroger), you’ll probably have an easier time with this than if you frequent smaller independent stores. since most chain stores follow some sort of corporate format dictated by headquarters.
Chances are, if this is your favored store, you probably already have a general idea of its layout. This layout will generally follow from town to town, though there may be exceptions. Below is my crude reconstruction of the standard Safeway layout from memory, and I’ve found it’s reasonably consistent, though I have seen the produce and bakery sections reversed once or twice. Safeway generally observes standard profit-making organizational principles (expensive items near the entry, most expensive toward the right where most people enter the store).
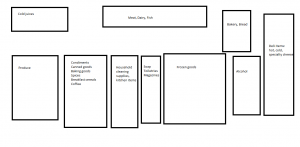
All hail MS Paint! And I accidentally forgot the soda and chip aisles, apologies.
(click for full size)
Independent grocery stores are a radically different proposition. My second go-to store chain, Sprouts, has differing organizational schemes for each of the two locations I’ve visited.
Why on earth would you want to do this? Once you know your store’s layout, you can transform your grocery list into an expert tour guide, so you don’t have to worry about retracing your steps. This has happened to me more than once; the last time, I missed a lone orange at the bottom of my list at the other end of the store, and got bruised by cart after cart on the way back to the produce section. Not fun.
A few tips:
- Use technology! Not everyone creates a mental model of the store in their minds. So bring a camera or your phone. Take pictures of each store section and aisle labels sequentially as you walk through the store. Refer to these pictures later after you formulate your preliminary shopping list.
- Use personal experience! If you’ve been shopping at your store of choice for a while, you probably have a fair idea of where everything is. As you continue to shop there, take mental notes on the general location of each of your items. Imagine where they are in relation to the overall store layout.
- Use a notebook! Paper’s always good for sketching quick schematics of your store.
- Don’t worry about minute details. Having a general idea of item categories and their locations is good enough; your objective isn’t to memorize the location and type of every last item in the store.
Refining Your Grocery List
I’ll admit, this part has been a challenge, especially since my unique cooking requirements force me to make a new grocery list every week.
First, I did the pen and paper thing, writing down every last ingredient in each recipe. I missed several, and it took forever. Not to mention, my list was out of order and I wandered in aimless circles all over the store. Next, I tried Notepad, the default Windows text editor. It worked. Sort of. At least typing the list took a lot less time. Still, I ended up backtracking several times during the subsequent shopping trip. I toyed with copying and pasting each individual line into the right order, and said, “Nope.”
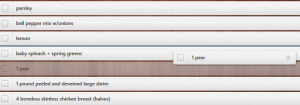
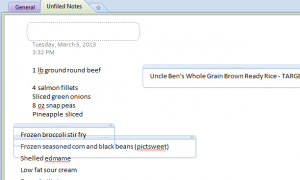 Then came OneNote. This was almost better. At least I could enter each item as a separate text box and categorize all of them correctly when I’d finished. But you can see the real problem right here: when it came time to arrange the items, the text box handles overlapped, making organizing the list a pain the rear.
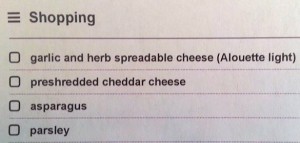
Enter the oh-so-appropriately-named Wunderlist, available for Windows, Android, Mac, and iOS. I highly recommend this program, not simply because it works seamlessly for those of us using more than one manufacturer’s platform (me: Windows and Android), but because you can drag and drop items easily. You’ll see why this is so important in a moment.
So, you have your diagram of your store’s layout, or a series of sequential photos of the aisle labels, or a mental reconstruction. You’ve installed Wunderlist on your PC or Mac. You’ve created an account to sync your items to the web or your phone, if you wish. What next?
 1. Type your items in the “Add item” box one at a time, hitting the “Enter” key after each one. Because I’m lazy, I’d recommend just using the default “Shopping” list that Wunderlist includes by default. Entry time for 20-25 items: 3 minutes
2. Now that you’ve finished, refer to your diagram or your photos, and begin dragging and dropping each one into the approximate order they’d appear in the store. Example: produce is nearest the front, so drag and drop all fruits and vegetables at the top of the list. Organizing time: 2-5 minutes for 20-25 items.
3. If you’re clumsy, right-click on the list name in the left pane to print your list and skip Step 4.
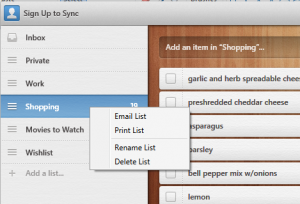
4. If you’re not, install the mobile version for either iOS or Android and sign in. Your list will be right there when you open the app. Happy shopping!
5. For us clumsy, phone-dropping types, the printed list is a thing of beauty. Happy shopping!
If you have stock items you purchase every week, Wunderlist will save them for you, or your non-standard items if you don’t delete them. Unfortunately, the Windows version of Wunderlist doesn’t include a menu bar or standard drop-down menus. If you want to interact with the program, you’ll need to play around with right-clicking everything.
To remove your non-standard items:
- If the items you want to delete are sequential, hold down the “Shift” key and click the first and last items. Then press the “Delete” key, and click “Yes” when Wunderlist asks if you really, really do want to delete those items.
- If the items are scattered throughout your list, hold down the “Ctrl” key, then click each of the items you wish to remove. Press the “Delete” key, and click “Yes” to verify you want to delete the items.
Another drawback to the Windows version is that Wunderlist likes to minimize itself to the Notification Area or System Tray (depending on which version of Windows you use) when you click the X. You’ll need to right-click the icon and select “Exit” from the menu in order to actually shut the program down. Overall, though, I’ve found these nuisances are minor.
Conclusion
Organizing and sequencing your shopping list may seem cumbersome at first, but after a try or two, it’ll become almost second nature. Additionally, I’ve found that this technique shaves about ten to fifteen minutes—at the very least—off of each shopping trip in store. And Wunderlist makes list-making much faster than the old-fashioned pen and paper variant, probably shaving off another five to ten minutes of the list-making process.

